How to Manage Microsoft Teams Using Powershell
Table of Contents
Microsoft Teams module for Powershell makes it very easy for office365 Admins to manage Microsoft Teams. By using the Powershell module for Microsoft Teams, you can get information about all your Teams in the organization, or you can bulk create Microsoft Teams, Channels, or you can add bulk users or even remove them.
You can use the same Microsoft Teams module for reporting purposes as well. It comes very handily when you want to know the total numbers of Teams, Owners, Members, and the total number of channels for a specific Team and much more.
To do all these things first, we need to Install the Microsoft Teams Powershell module by running the following command in your Powershell for windows Or PowerShell Core.
Install Microsoft Teams Powershell Module
Install-Module -Name MicrosoftTeams
Once the installation of the Module is over, its time to connect to Microsoft Teams Online services by running the following command.
Connect To Microsoft Teams Online Services
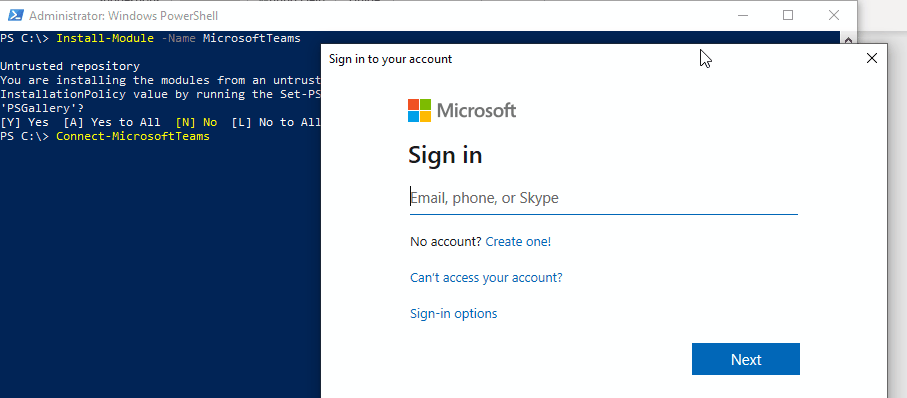
Connect-MicrosoftTeamsOnce you enter the Connect-MicrosoftTeams command in your Powershell console, it will ask you to log in by opening the Microsoft Log In page. You will need to Sign In with the Office365 Admin account or with the Global Administrator account.

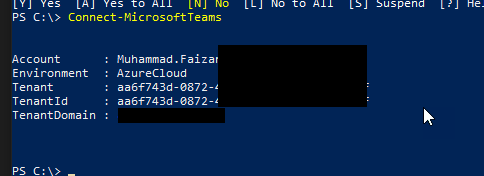
After successfully Sign In.

Finding Commands For Microsoft Team Management
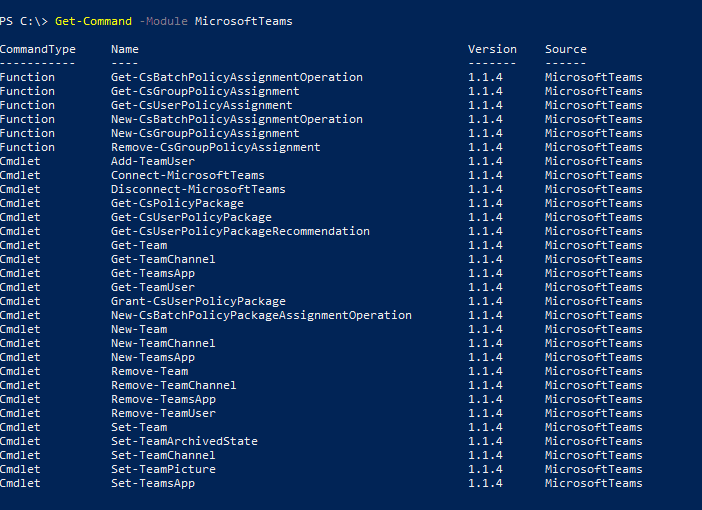
Once you are successfully connected to the Microsoft Teams Online Services Its time to check what are the new commands available to us in our toolbox related to the Microsoft Teams by running the following command.
Get-Command -Module MicrosoftTeams
Get-Team Powershell Command
As you can see, now we can manage a lot of things related to Microsoft Teams using Powershell. Let’s try our First command Get-Team
Get-Team command will get all the Teams in your organization, and if your organization has a lot of Teams, then it might take a few minutes to get that information display in your Powershell console.
Get-Team
If you do not want to get information about all the Teams, you can modify the Get-Team command a little bit to get the information about a specific Team by entering its Display Name.
Following command will only get the information related to the single Team with the Display Name “Test”.
Get-Team -DisplayName "Test"
Getting Team Owners & Members
Once you get the basic information about the Team, its time to dig a little deeper. Let’s find out information about the Team Owners by running the following commands.
First, we will save Test Team GroupId into a variable so we can use it multiple times for many other things. Every Team in your organization will have a unique GroupId. For our test from now on, I will be using my Test Team created for this Tutorial called Test.
$GroupId = (Get-Team -DisplayName Test).GroupId
Now let’s get the Team Owner information by using the $GroupId variable and running the following command.
Get-TeamUser -GroupId $GroupId -Role Owner
We can find out Team members as well by just modifying the same command a little bit. Just replace the word Owner with the word Member in the same command.
Get-TeamUser -GroupId $GroupId -Role Member
Adding Or Removing Team Members using Powershell
Now let’s modify some information by adding a new owner to the same Team by running the following command. Remember to change someone@domain.com with the correct user email.
Add-TeamUser -GroupId $GroupId -User someone@domain.com -Role OwnerAfter adding any Team Member or Team Owner, you can recall our previous command Get-TeamUser to get the updated user information and for making sure if the user was successfully added or not.
Similarly, you can also add Member to the Team by just replacing the word Owner with the Member using the same command.
Add-TeamUser -GroupId $GroupId -User someone@domain.com -Role MemberRemoving the Owner or Member of any Team is also very straight forward just replace Add-TeamUser with Remove-TeamUser.
Remove-TeamUser -GroupId $GroupId -User "someone@domain.com" -Role OwnerRemove-TeamUser -GroupId $GroupId -User "someone@domain.com" -Role MemberThat’s was it for this Tutorial. If you want to know more about Microsoft Teams and Office365, don’t forget to bookmark our website.
Also, if you want to know about recovering deleted Microsoft Teams, you can check this Tutorial How to Restore a Microsoft Office 365 deleted Team using Powershell
You might also be interested in:


