How to Take a Full Backup of Windows 10 on an External Hard Drive
Have you ever think what will happen if your Windows 10 crashed? Nothing big right? You will just backup your data format the hard drive and install the new Windows 10 on it very simple.
But what if your hard drive crashed? With years of data on it. Nobody wants to be in this kind of situation, especially if you have only one hard drive and all the data were save on it.
Things can go even worst if you have clients data collected on the same hard drive as well or if you were working on some project and just before submitting the project, the hard drive got crashed. Anyone could be in this kind of situation so if you don’t want to be one of them then you need to act fast and create a full backup of your PC.
There are many kinds of backup, but here we will talk about Windows Image backup which comes free with windows 10. It is suitable for one-time full image backup of Windows 10. It’s speedy and backup everything from saved data installed programs and everything else on the partition you want to backup, but it’s not much efficient.
If you make any changes to your data or your operating system, you cannot just add that to the existing backup or restore of a single file is also not possible. You either have to make a full backup or full restore that’s all that you can do with it.
This kind of backup is also beneficial if you want to backup Windows 10 from one computer to another computer or external drive. With all the pros and cons of Windows 10 image backup, I still believe something is better than nothing, so let’s see how we can make our first Windows 10 Image Backup.
How to create full Image Backup Of Windows 10
Before you follow the steps mentioned below, make sure you have an external Hard Drive Or create a Network Share where you can save your backup file.
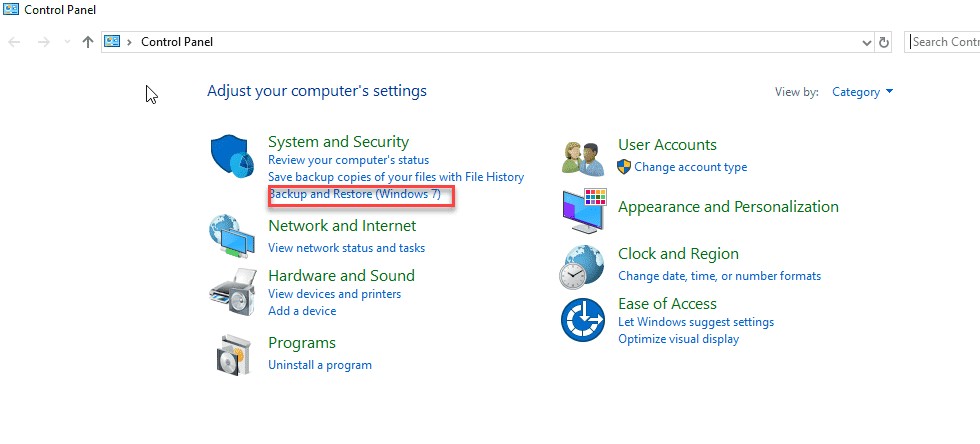
1. Open the control panel and click on Backup and Restore (Windows 7) as shown in the screenshot below.
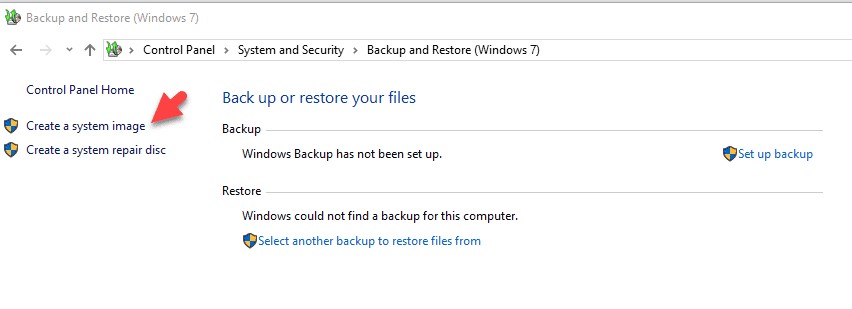
2. Click on Create System Image as shown in the screenshot below.
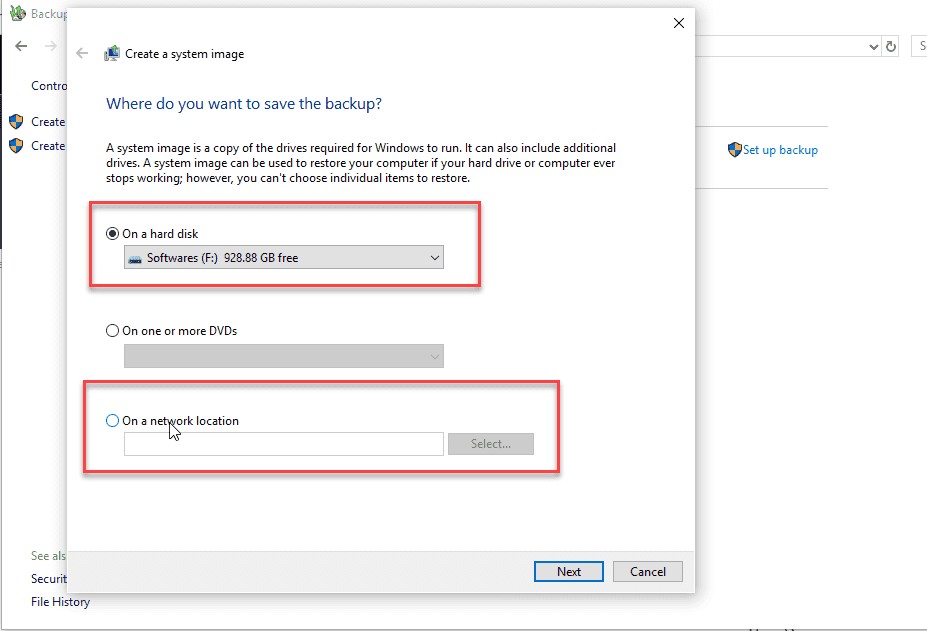
3. Choose the location where you want to save your backup as shown in the screenshot below. I will suggest to keep it on external Hard Drive because it will be fast and much safer than saving on anywhere else.
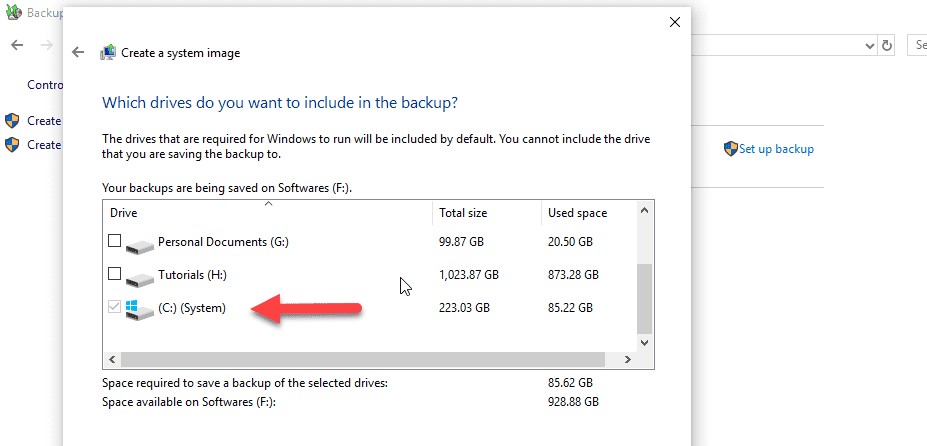
4. Choose the Partition you want to backup if you are only interested in system data than only choose the Partition where your Window is installed. In my case, it is installed on C drive so I will backup only C Drive. If you want to make a backup of any other Partition choose it as well. Just make sure you have enough space available on your destination drive/folder.
5. Once you are done selecting everything, click on Start backup as shown in the screenshot below.
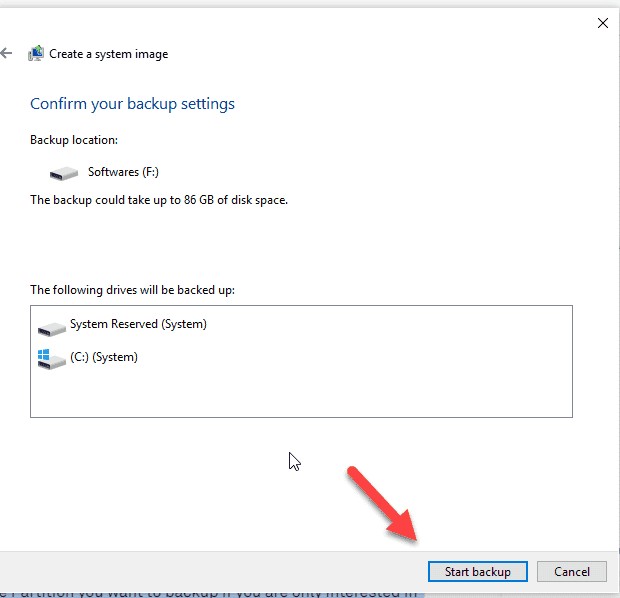
If you have completed all the steps mentioned above backup process should have been started now. It will take some time to finish the backup, but you can continue your work.
Windows Image backup utility uses shadow copy technology to backup open files or programs so you no need to worry about your in-use data or applications. Windows image backup utility is smart enough to back up everything without interrupting your work.
Once the backup process is completed, you will get a pop up asking you to create a recovery disk. This is important and you will need this to recover your data in case if you Windows of your Hard Drive crashed.
You might also be interested in the below topic.


