How To Turn Off Windows 10 Updates Permanently
Table of Contents
If you are looking to turn off Windows 10 updates permanently or if you want to take control of Windows 10 updates, then you come to the right place. Here you will learn many different ways to disable Windows 10 updates or enable them as needed permanently.
Before we continue, you should remember updates are crucial for any operating system, including Windows 10. It’s never advisable to permanently disable Windows 10 updates because they fix bugs and vulnerabilities in the Operating system code.
Turn off Windows 10 updates using Windows Update Blocker v1.6
Windows Update Blocker v1.6 is the best option when it comes to turning off Windows 10 updates. It is very straightforward to use this software, and it never fails. If you want to turn off Windows 10 updates, this should be your first choice.
Download Windows Update Blocker v1.6
To download Windows Update Blocker v1.6, visit the below link, and your download should start automatically, as shown in the screenshot below.
https://www.sordum.org/downloads/?st-windows-update-blocker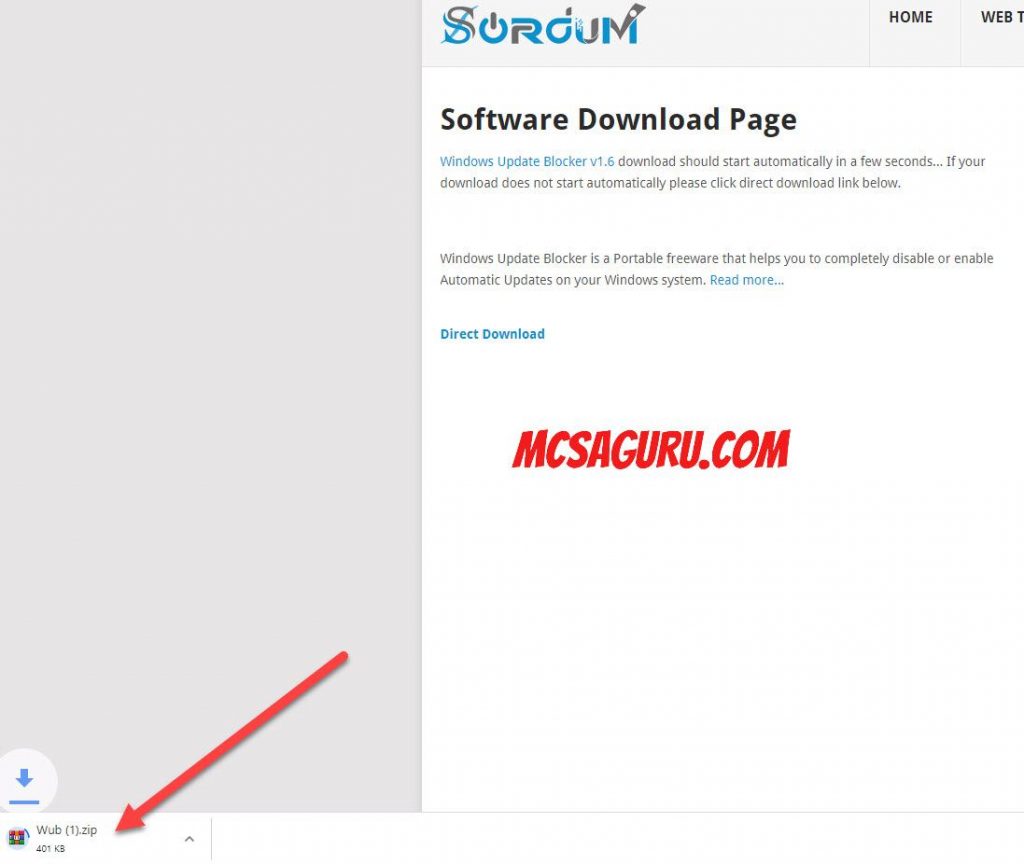
After downloading, extract the Wub.zip file, and open up the folder. Double click on Wub_x64 if you are using a 64bit operating system else, double click on Wub.exe.

Once the application is open, click on the Disable Updates radio button, and tick the box next to Protect Service Settings, and click Apply Now.
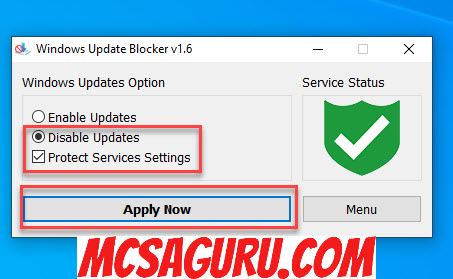
Your Windows 10 updates are now turn off permanently. If you ever want to enable them, rerun the same application, and choose the option, Enable updates and click on Apply Now and updates will be enabled again.
Turn off Windows 10 updates by disabling the Windows Update Service
Another way of turning off Windows 10 updates is by disabling Windows 10 update service. This solution also works, but it is not reliable because many software can enable the Windows Update service thinking it stops because of the service issue. It’s my least favorite way when it comes to disable or turn off Windows 10 updates.
Procedure:
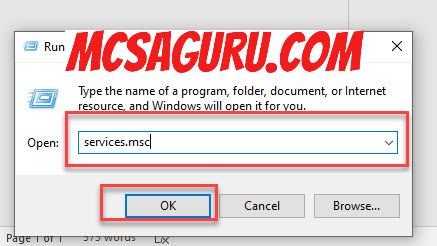
Press the Windows and R (Win+R) button of your keyboard to open the Run Dialog box and write “Services.msc” in it, and hit the Enter key to open up the Windows 10 Service control panel.

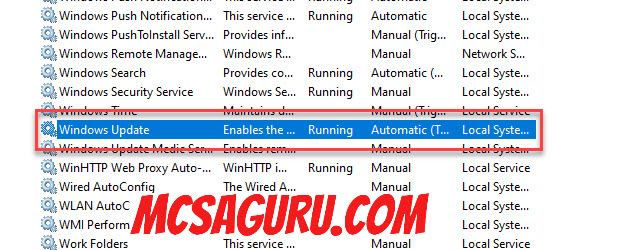
Once the Services panel window is open, scroll down and look for Windows Update service, as shown in the screenshot below.
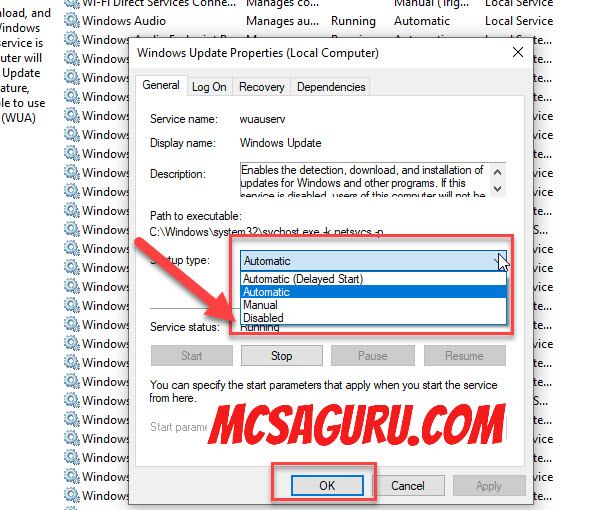
Once you find the Windows 10 update service, double click on it to open up the options window. Once the Properties window is open, click on the Startup Type dropdown menu and choose “Disabled” and click the OK button as shown in the screenshot below.
Turn off Windows 10 updates using Windows Command Prompt
Here is another easy way to Turn off Windows 10 updates using Windows command Prompt. This method is similar to the GUI procedure mention above, which disables the Windows 10 Updates by disabling the Windows Update Service but using the Windows command prompt.
Procedure:
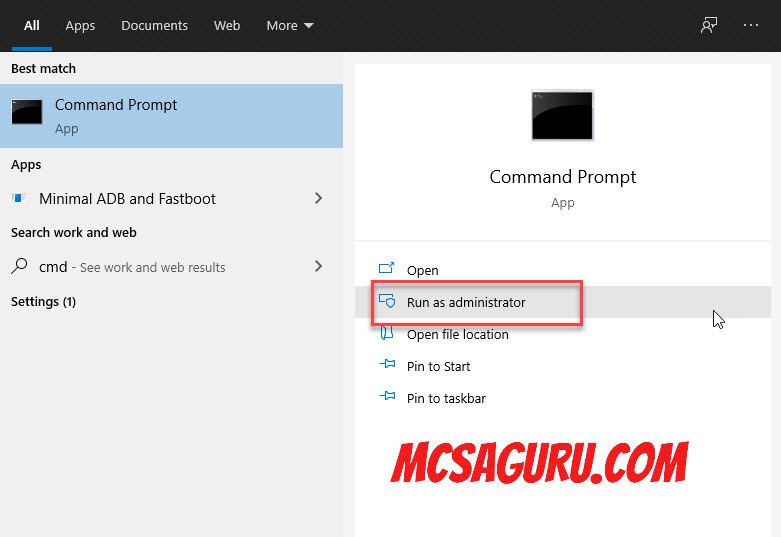
Click on the Windows 10 start menu and type “CMD” and choose Run as Administrator as shown in the screenshot below.
First, let’s check the Windows 10 update service status by running the below command. If it is running, we need to stop it, and if it is not running, then we do not need to do anything
sc.exe query wuauserv
In our case, the Windows 10 update service was running, so let’s stop it by running the below command in the Windows command prompt as shown in the screenshot below.
sc.exe stop wuauserv
After stopping the Windows 10 update service, it’s time to set its startup type to “Disabled” by running the following command.
sc.exe config wuauserv start=disabled
Now, let’s check the status of the Windows 10 service again to make sure it is not running anymore by executing the following command.
sc.exe query wuauserv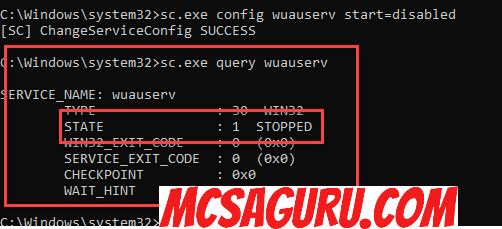
As you can see above, the Windows Update service state is “stopped”, which means service is no more running, and Windows 10 updates are not running anymore.
Turn off Windows 10 updates using Windows Powershell
This method is similar to the Windows Command prompt method shown above, so without going into the details, I will show you the Powershell cmdlets right away.
Procedure:
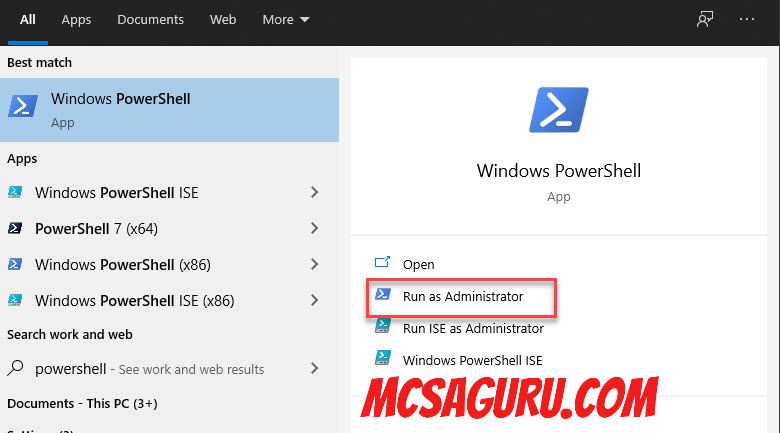
Tap on the Windows 10 start menu and type “Powershell” and choose Run as Administrator as shown in the screenshot below.
Execute the following Powershell command to check the status of the Windows 10 update service.
get-service -DisplayName "Windows Update"
As you can see in the above screenshot, the service status is “Running”, so I will stop it by running the following command in the Windows Powershell.
stop-service -DisplayName "Windows Update"
Once the Windows 10 update service is not running, it’s time to set its startup type to “Disabled” by running the following Powershell command.
get-service -DisplayName "Windows Update" | Set-Service -StartupType "Disabled"
Now, let’s find out the Windows Update service status again by running the following Powershell command
get-service -DisplayName "Windows Update"
Turn off Windows 10 updates using Windows Group Policy Editor
This method is the safest of all the methods mentioned above because it does not turn off the Windows 10 updates or disable them; instead, it will notify you when the new updates are available. It will allow you to decide if you want to install them or not instead of automatically installing the Windows 10 update.
Procedure:
Press Windows and R (Win+R) button on your keyboard to open up the Run Dialog box and write “gpedit.msc” in it, and hit enter to open up Group Policy Editor.
gpedit.msc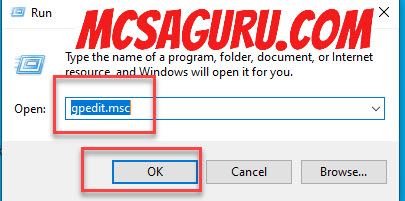
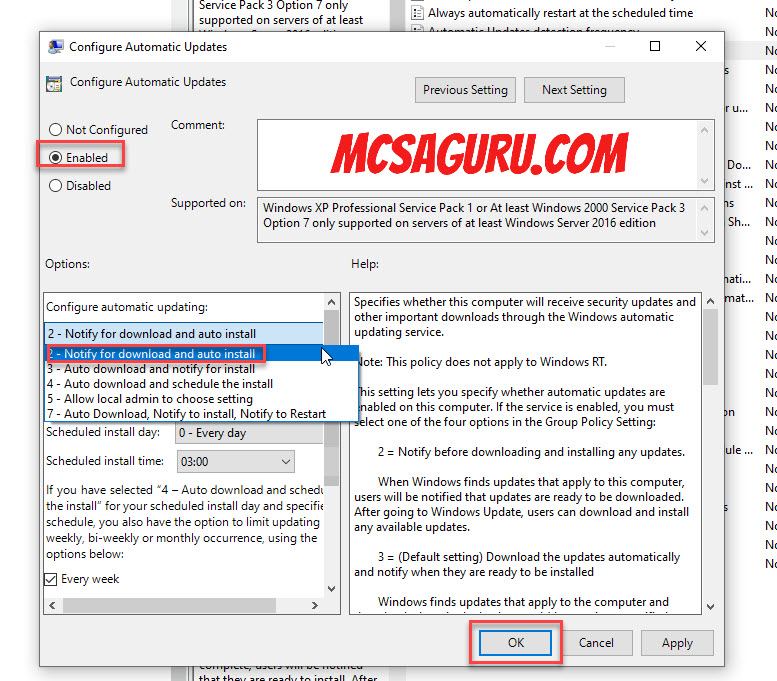
Once the Local Group Policy Editor is open, go to the following path “Computer Configuration >> Administrative Templates >> Windows Components >> Windows Update” and on the right-side panel, look for the option called “Configure Automatic Updates” and double click on it to open up the options window.
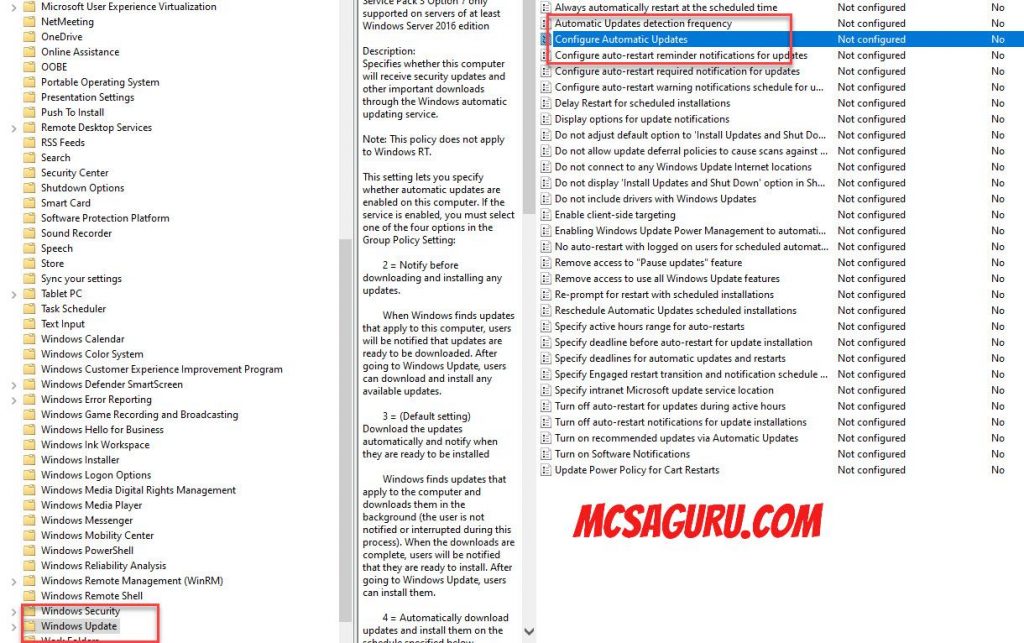
Now, select the “Enabled” radio button option and click on the dropdown menu under the “Configure automatic updating” options and select the option “Notify for download and auto-install” and hit the OK as shown in the screenshot below.
