MicrosoftPowershellWindows 10
How To Disable Windows Defender Permanently in Windows 10
Table of Contents
Table of Contents
I have received many emails to create a guide about How To Disable Windows Defender Permanently in Windows 10 because I think many of you cannot do that in windows 10. Before starting with this guide, I want to let you know that it’s never a good idea to disable Windows Defender until there is a solid reason.
You need to be aware that if you disable Windows Defender, especially if it is the only antivirus on your computer, you are putting your computer safety at significant risk. Hackers could steal your personal information, and in the worst-case, hackers could control your computer or encrypt your data for money.
Anyway, let’s start now, and in few steps, I will show you How To Disable Windows Defender Permanently in Windows 10.
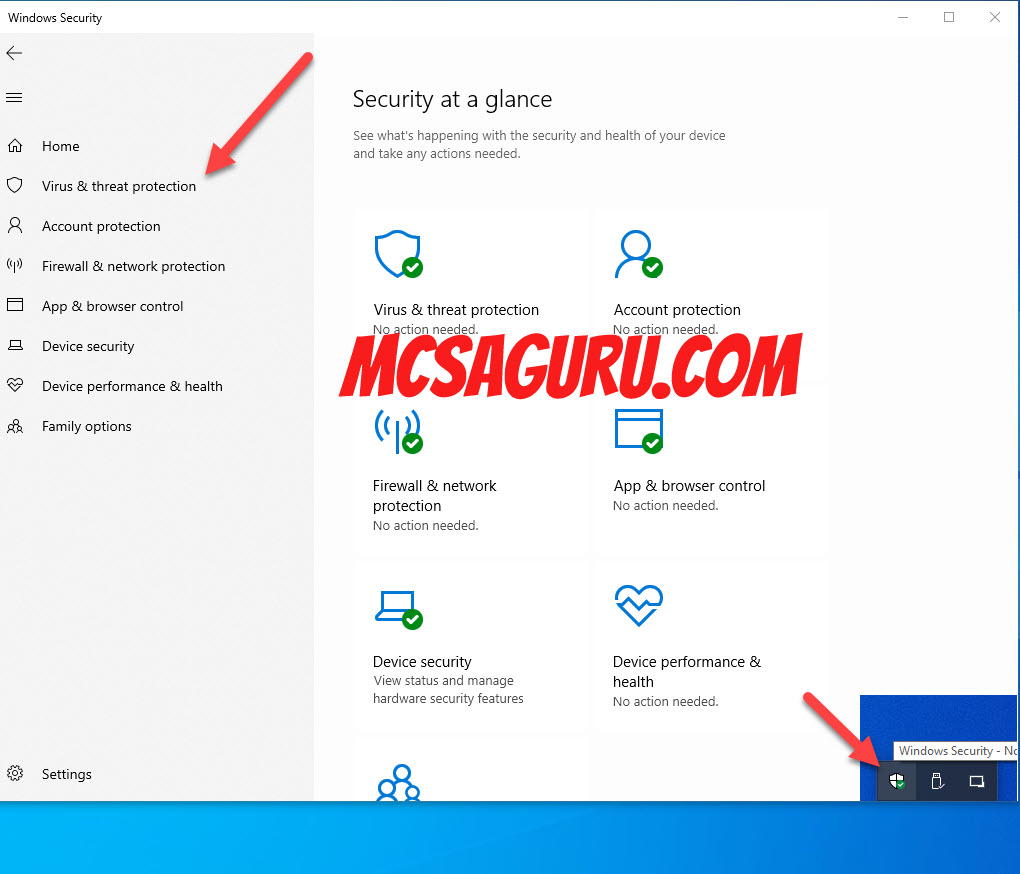
Double click on the Windows Defender taskbar icon and click on Virus & threat protection, as shown in the image below.
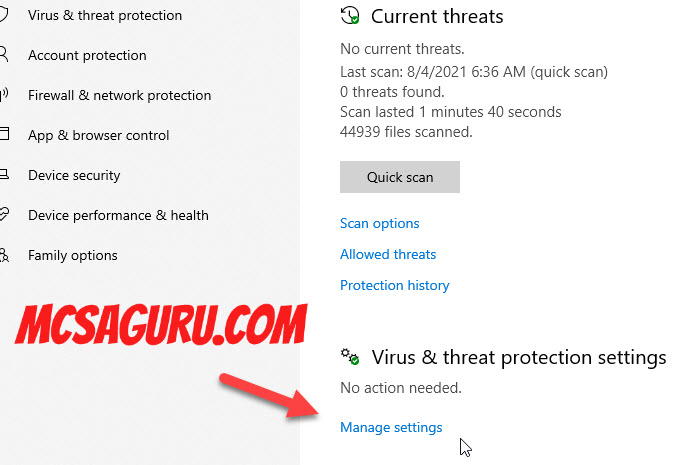
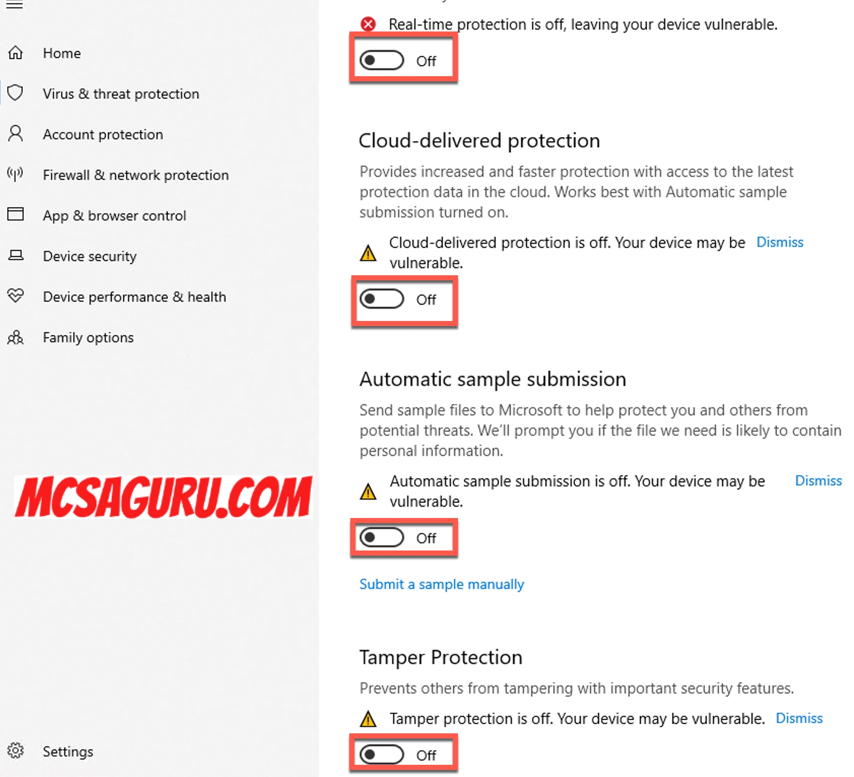
Now click on the manage settings and Turn Off all the Windows Defender security settings, as shown below.
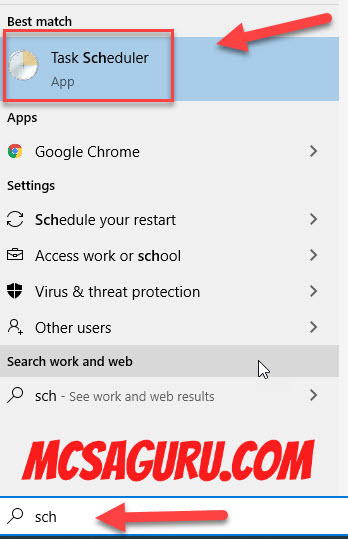
Open your search bar and search for Task Scheduler and click on it to open the Task Scheduler.
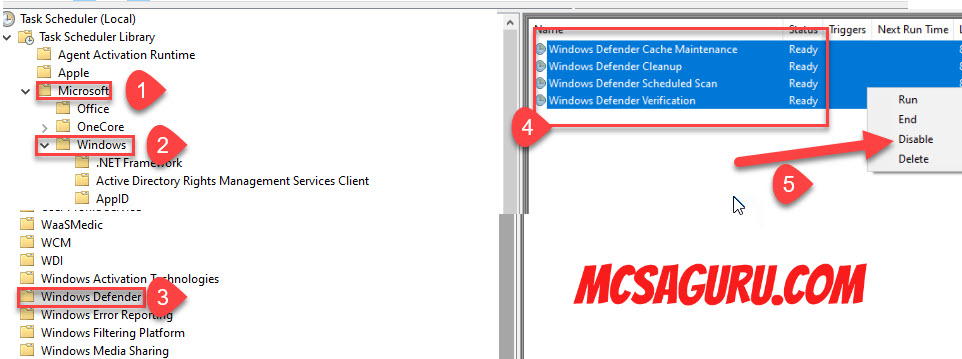
Navigate to the path “Task Scheduler Library->Microsoft->Windows->Windows Defender” and disable all the Schedule tasks as shown below.
Press Windows + R key on your computer keyboard to open the Run Windows and type Gpedit.msc in it and press enter as shown below.

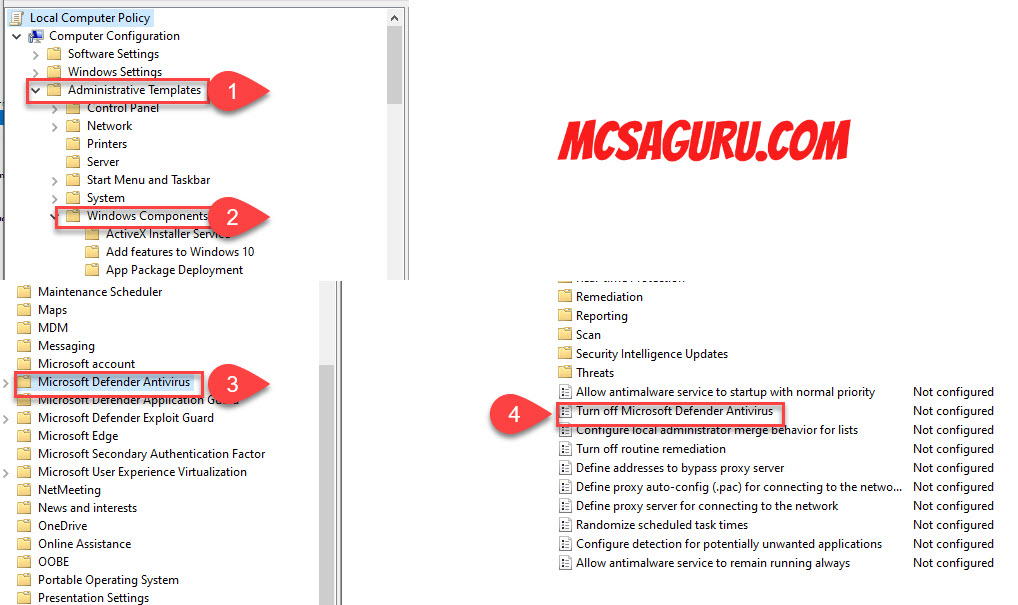
Once is Group Policy Editor is open, navigate to the following path “Local Computer Policy->Administrative Templates->Windows Components->Microsoft Defender Antivirus” and double click on the Turn Off Windows Defender Antivirus policy.
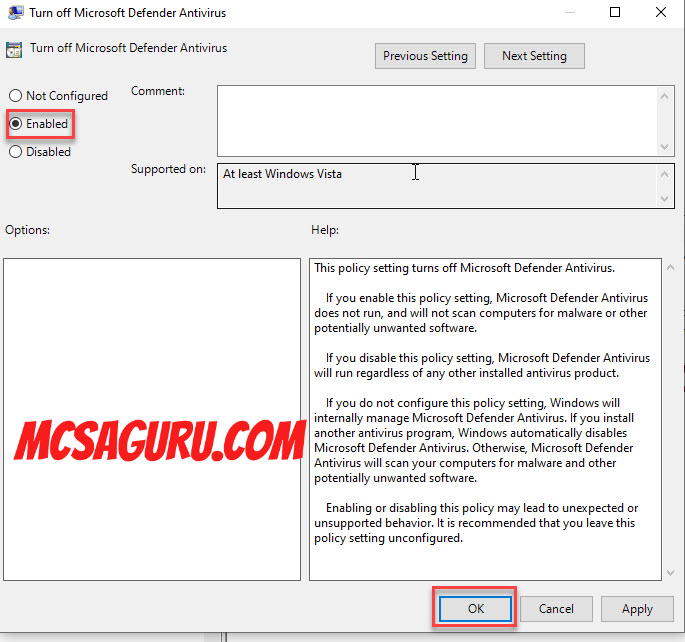
Click on the Enable radio button to enable the Group Policy and disable the Windows Defender Antivirus, and press OK.
Close every open window and restart your computer to complete the Guide to Disable Windows Defender Permanently in Windows 10.
If you have any question feel free to contact me at MCSAGURU.


