Active DirectoryMicrosoftWindows Server
How to Transfer FSMO Roles From one Domain Controller to another Domain Controller using NTDSUTIL
Table of Contents
Table of Contents
Here is another tutorial on Transferring all five FSMO Roles From one Domain Controller to another Domain Controller using NTDSUTIL. In my previous article, I transfer all five FSMO roles using different GUI’s and management consoles. In this tutorial, we will be using command prompt and NTDSUTIL tool, but if you do not like to work with Command Prompt, you can use GUI to transfer all the FSMO roles.
Before we start transferring the roles, it’s a good idea to run the query command to know which server is currently holding the FSMO Roles.
Open the Command Prompt as Administrator and run the following command in it.
netdom query fsmo
As you can see, all my FSMO roles are on the server called DC2, and I will move them to my second Domain Controller named DC1.
As your Command Prompt is still open, run the NTDSUTIL command to run the NTDSUTIL utility, as shown in the image below.
ntdsutil
Next, type the roles command in the command prompt.
roles
After that type the connections command as shown in the screenshot below.
connections
Now we need to know the name of the other Domain Controller who will hold all the FSMO roles. In my case, my second DC name is DC2. Once you find the name of the server, enter the following command in the command prompt.
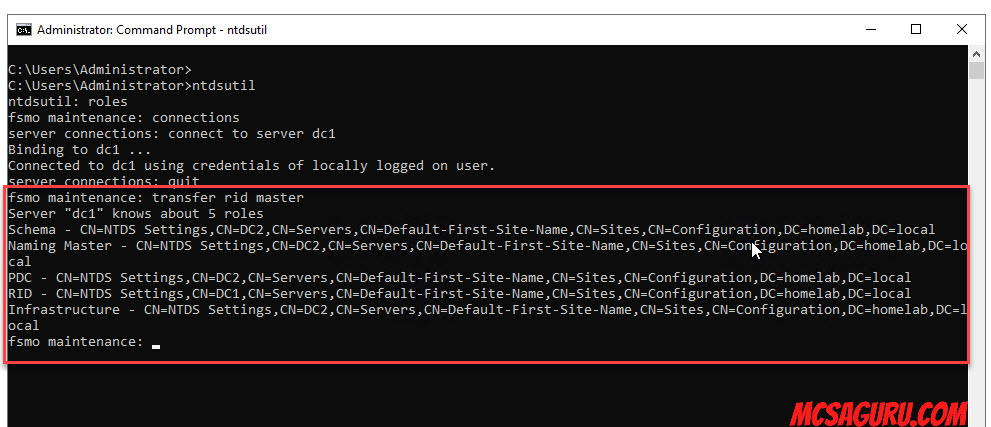
Connect to server DC1Ensure that you are connected to the new server as shown in the image below.

after that, type Quit to exit the connection mode.
quit
Now we are ready to enter the transferring commands. In my case, I will be transferring all the FSMO roles, but you can move one or all the FSMO roles it all depends on your needs.
Enter the following command in the command prompt to transfer RID master role to the previously connected server, which in my case is DC1. Once you enter the command, it will ask you to press Yes to confirm.
transfer rid master

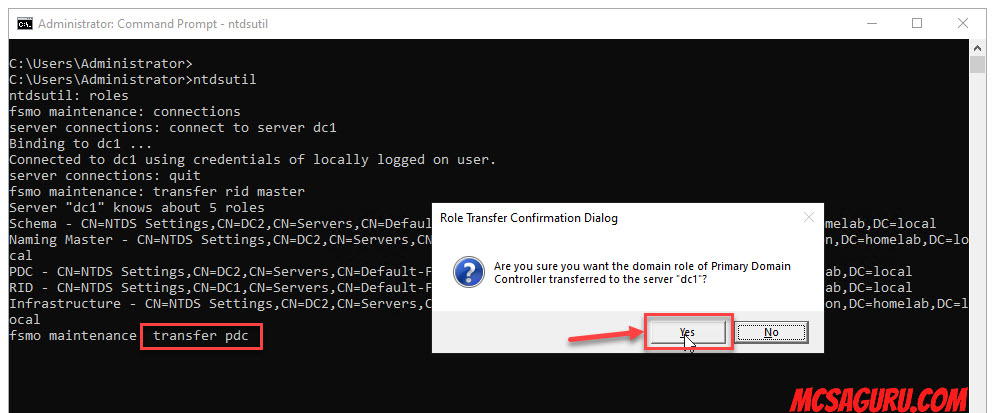
Enter the following command in your command prompt to transfer the PDC role and press Yes to confirm.
transfer pdc master

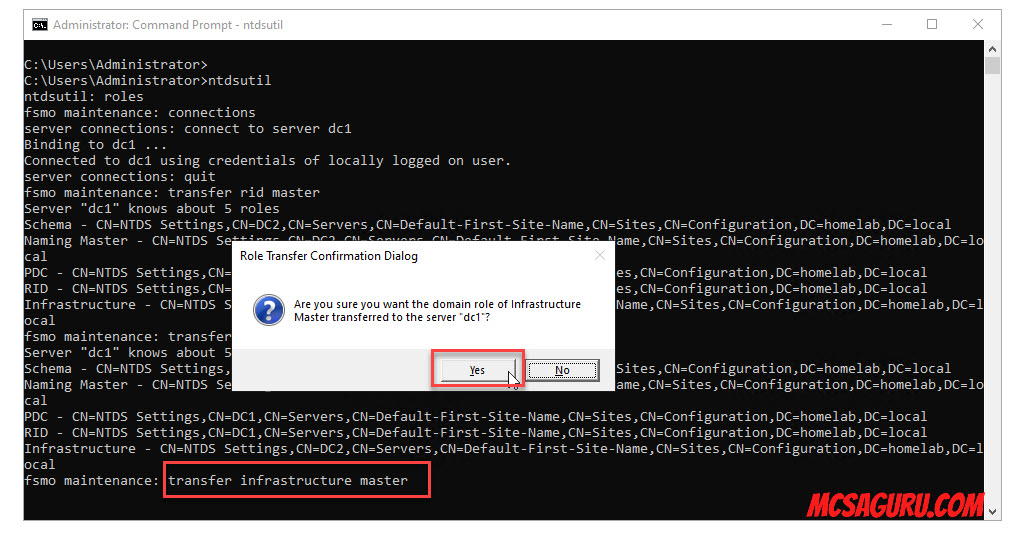
Next, enter the following command to transfer Infrastructure Master Role and press Yes to confirm.
transfer infrastructure master

Next, enter the following command to transfer Schema Master Role and press Yes to confirm.
transfer schema master

Lastly, enter the following command in the command prompt to transfer the Domain Naming Master role and click Yes to confirm the transfer.
transfer naming master

Now all the FSMO roles are transferred from DC2 to DC1, so type Quit twice in the command prompt and hit Enter twice to close the ntdsutil.
quit
Let’s rerun the FSMO Query command to make sure it’s showing correct results.
netdom query fsmo
As you can see, all the FSMO roles have been transferred to DC1, which is my new Domain Controller.
That’s all for this tutorial, and if you want to learn more, bookmark MCSAGURU.


