Active DirectoryMicrosoftWindows Server
How to move FSMO roles from one server to another server in Active Directory
Table of Contents
Table of Contents
In this tutorial, you will learn how to move/transfer one or more FSMO roles from one server to another server in Active Directory. There could be multiple reasons you want to do this, and the most common cause is upgrading/moving the domain controller to a new server.
In this tutorial, I will show you the transferring of one or more FSMO roles to the new server, so both of your DC’s (Old and New DC) should be online and running. If one or more DC’s holding one or more FSMO roles is down, the transfer method will not work, and we have to use seize method in that case.
There are two types of FSMO roles Forest Wide roles and Domain Wide Roles.
There are a total of three Domain Wide FSMO roles, which are mentioned below
There is a total of two Forest Wide roles.
Before we go ahead and start transferring the FSMO roles is always a good idea to query the FSMO roles so we can know which server is holding which FSMO role.
There is a total of five FSMO roles, and we can query them using the below command in your command prompt or your PowerShell console.
netdom query fsmo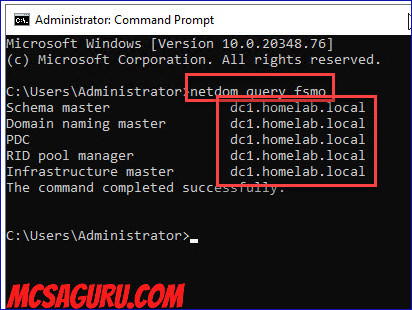
There is a total of three Domain Wide FSMO roles, and I will show you how to transfer all of them to the new server.
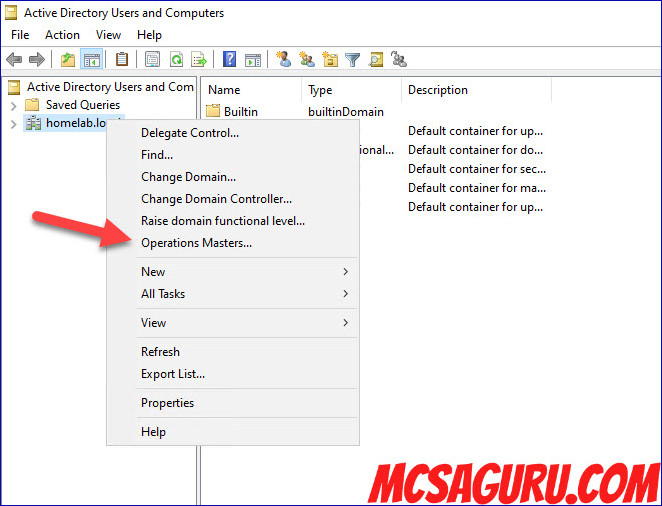
Open up your Active Directory Users and Computers management console and right-click on your Domain Name, and click on Operation masters as shown in the image below.
On the Operation Masters window, you will see three tabs at the very top corresponding to all three domain-wide FSMO roles names RID, PDC, Infrastructure. Click on the name of the FSMO role you want to change and then make sure the new DC is showing in the text box under the change button and click on Change to change the FSMO role to the new server as shown in the images below.
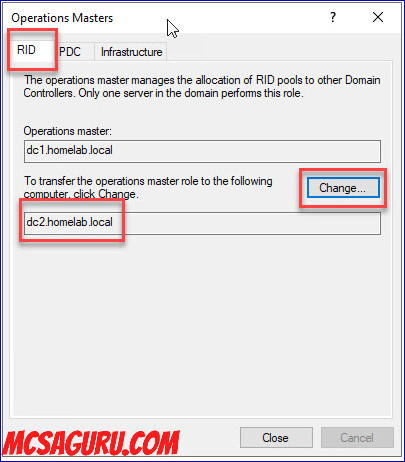
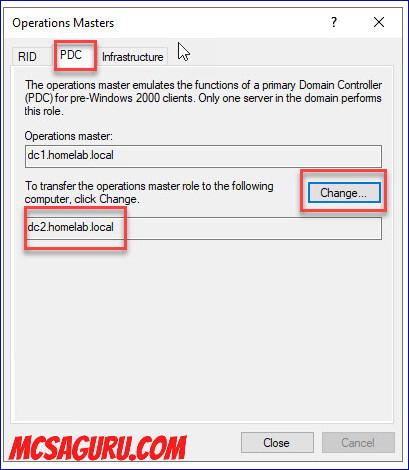
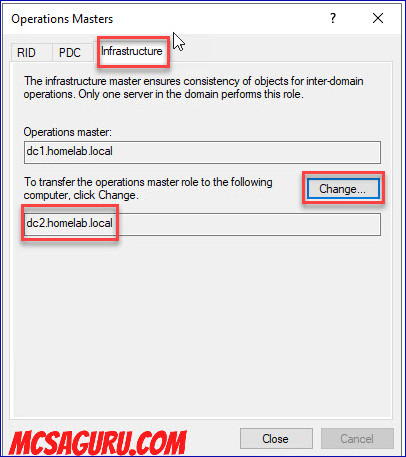
Transferring Domain-Wide FSMO roles was very easy because they all were in the same place, but transferring Forest-Wide is a little bit tricky, and they both are in different places.
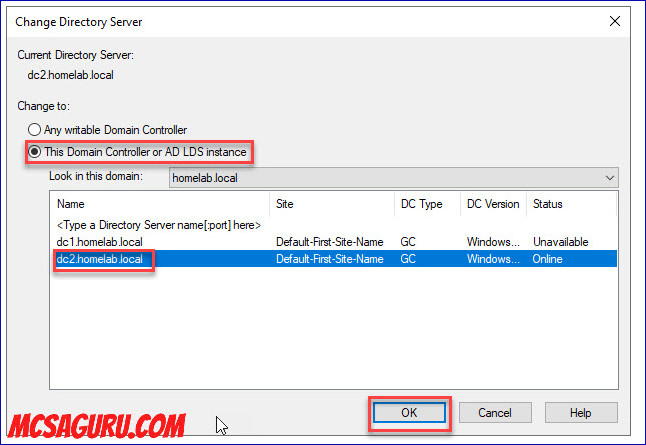
Open the Active Direct Domains and Trusts management console, and right-click on the Active Direct Domains and Trusts above the Domain Name and click on Change Active Directory Domain Controller.
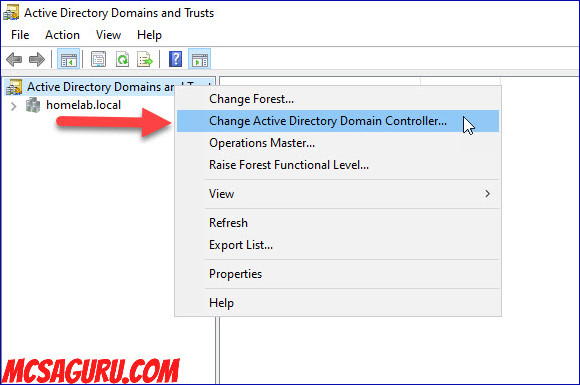
Select the server which will be your new Domain Naming Master server and press OK to exit. If you do not do this process, you will not be able to transfer the Domain Master Role to the new server. I have seen many tutorials only where they don’t show this step and directly try to change the Domain Master Roles, but it will not work because the new server will not even show when you try to change the server.
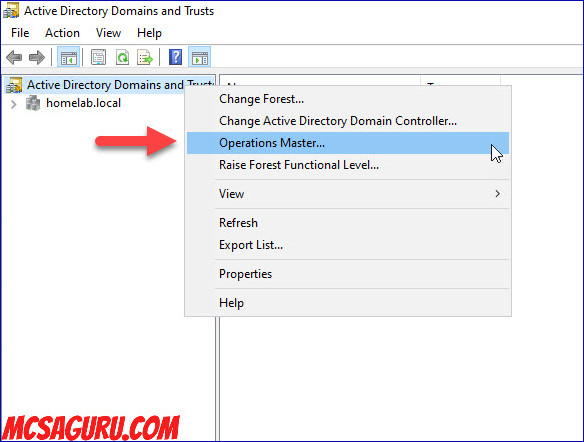
Once you have changed the Domain Controller, right-click again on the same place, but this time click on Operations Masters, as shown in the screenshot below.
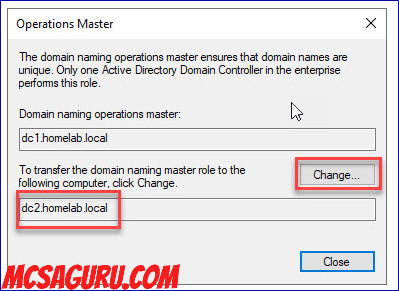
Ensure the new server name is showing in the text box under the change button and click on Change to change the Domain Naming master role to another server.
In order to transfer the Schema Master role, we have to register schmmgmt.dll into the system so we can add the Schema Management Snap-in to the MMC console. Open up your Command Prompt with Administrative Privileges and run the following command in it to register the schmmgmt.dll.
regsvr32 schmmgmt.dll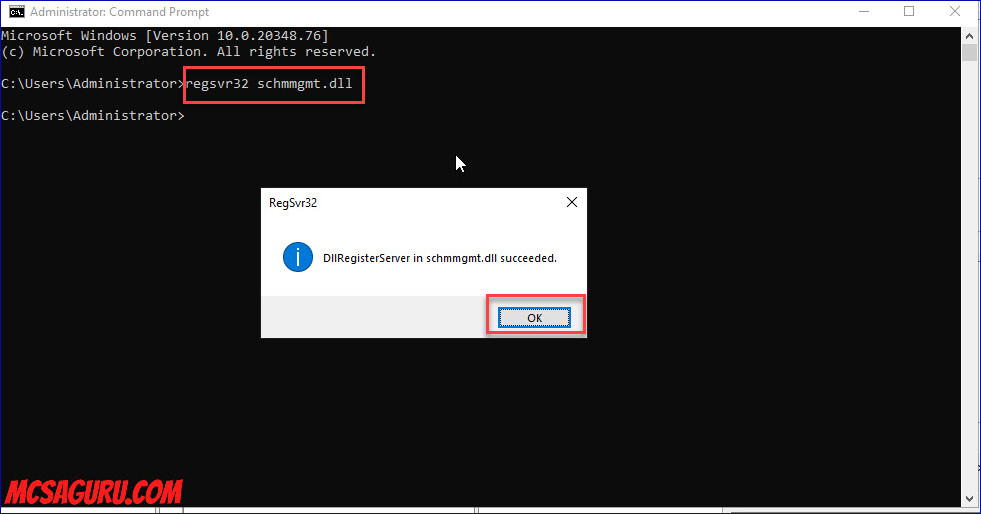
While your command prompt is still open, type MMC in it and press enter to open up the MMC Console.
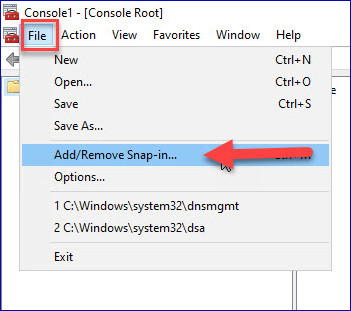
In the MMC console, go to File Menu, click on Add/Remove Snap-In.
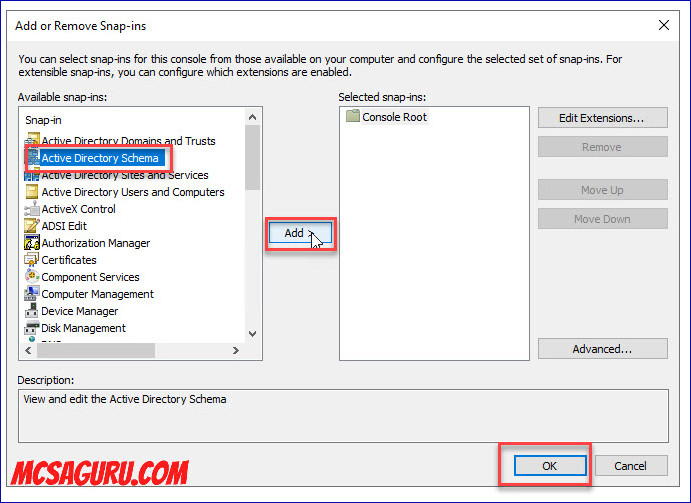
Next, select the Active Directory Schema from the left side of the window, click on the add button, and click OK.
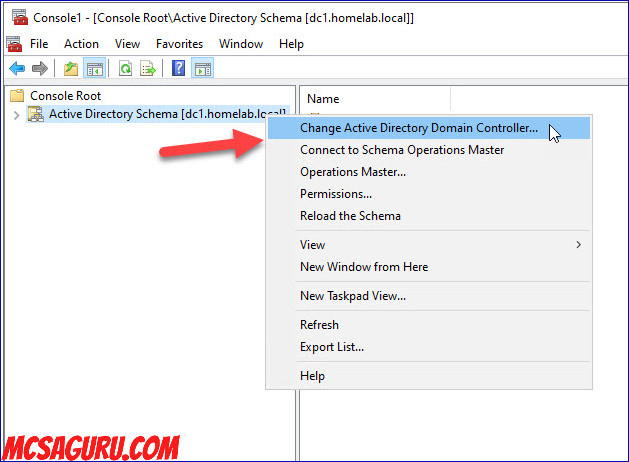
Next, Active Directory Schema console should be opened inside MMC console, right click on the Active Directory Schema and click on Change Active Directory Domain Controller option, as shown in the image below.
Next, change the Domain Controller to the new Domain Controller where you want to move your Schema Master role as shown in the image below.

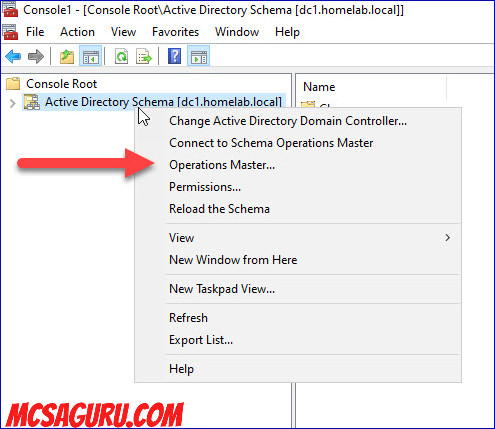
Now, right click again on the Active Directory Schema and click on Operations Masters, as shown in the image below.
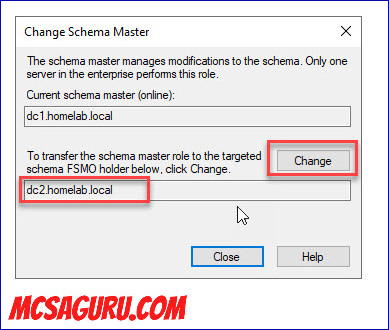
On the Change Schema Master window, make sure your new server is showing in the text box under the change button and click on the change button to change the Active Directory Schema master to the new server as shown in the image below.
That’s all for this tutorial, and if you want to learn more, make sure you bookmark MCSAGURU.
