How to Add Hyper-V Server to Veeam Backup & Replication 10
Table of Contents
How to Add Hyper-V Server to Veeam Backup & Replication 10, today we will learn how to add our Hyper-V server to our newly installed Veeam Backup & Replication server. Before we continue, you will need to make sure that you have already installed and running Veeam Backup & Replication server.
Requirements:
- Veeam Backup & Replication Server must be installed and running.
- Network Infrastructure should be in place.
- Domain Name Resolution should be in place and working.
- File and Print sharing should be enabled in the firewall and running.
- Proper credentials for Hyper-V Host. (User with Administrator rights on Hyper-V Host)
Adding Credentials to Veeam Backup & Replication:
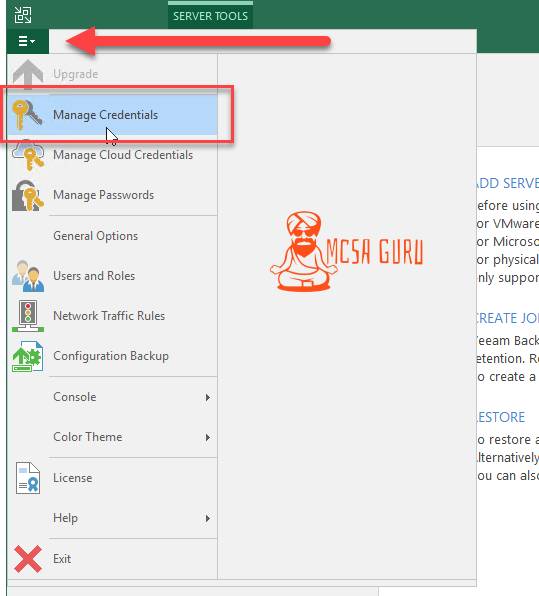
Open up your Veeam Backup & Replication console and click on the three bars at the top left of the console and click on Manage Credentials as shown in the image below.
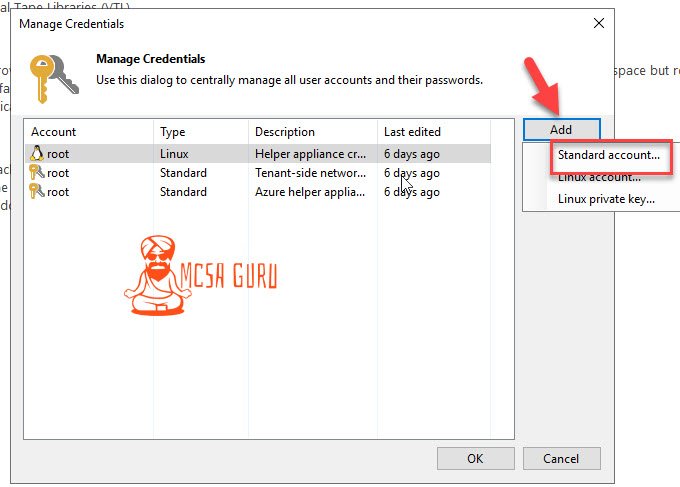
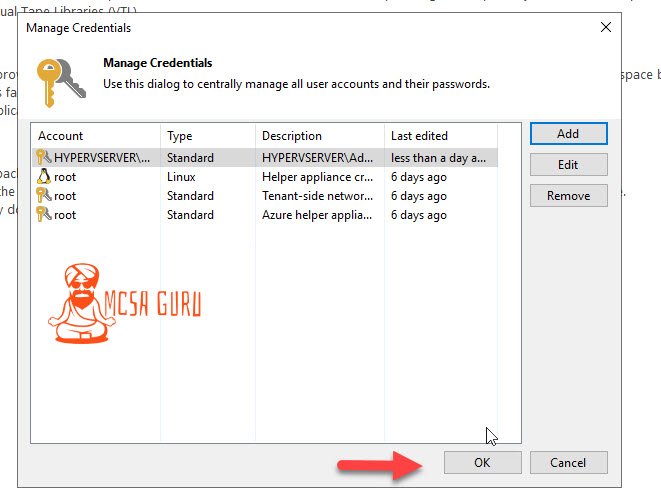
On the next window, click on the Add button and then click on the Standard account.
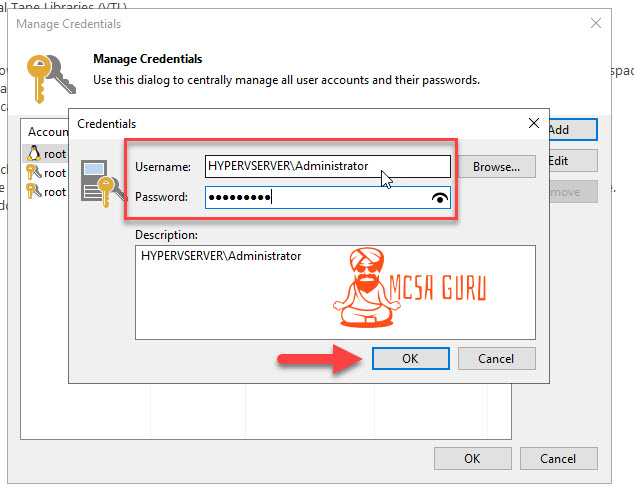
Now you need to add proper credentials for the Hyper-V host. You need to ensure that the user account you add has administrative rights on the Hyper-V server. Once you added the valid credentials, click on the Ok button to continue.
Next, you need to press the Ok button again to exit the Credential Manager.
Adding Virtual Infrastructure to Veeam Backup & Replication:
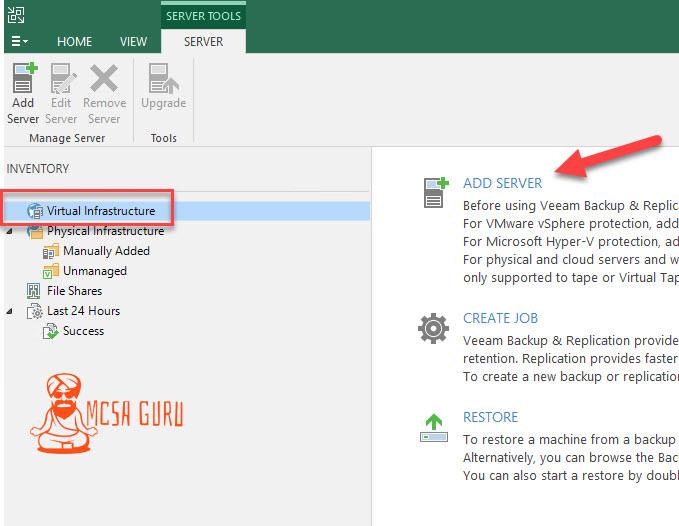
Once you close the Credential Manager, you will be back to the main console window, and Server Tools Tab will be selected. Click on the Virtual Infrastructure and then click on the Add Server button shown in the screenshot below.
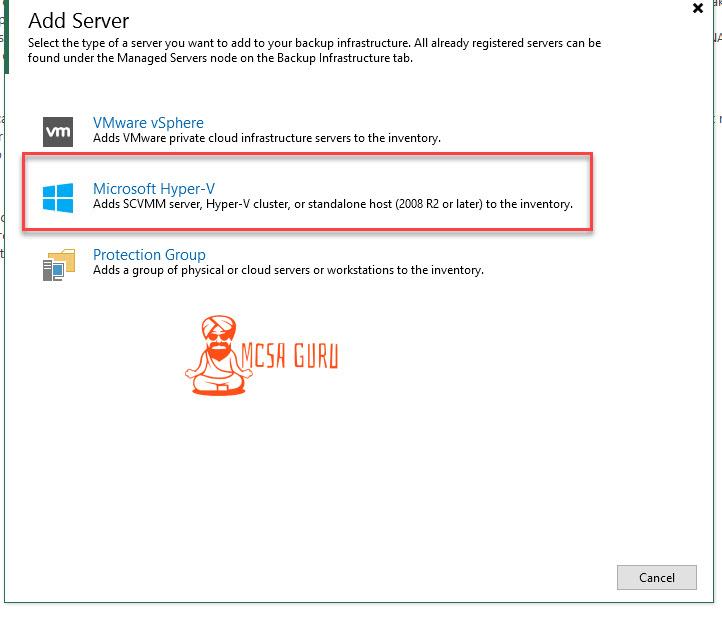
Next, you need to select your Virtual Infrastructure platform. We will choose Microsoft Hyper-V in our case.
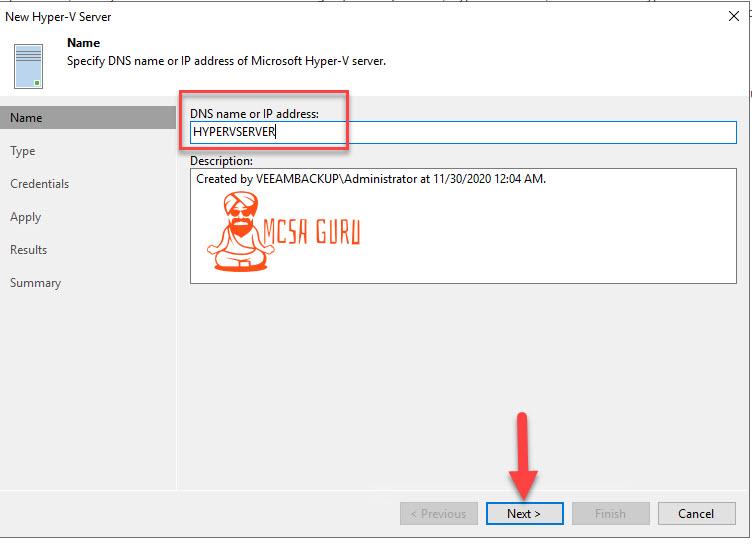
On the next window, you will need to enter your Hyper-V host Hostname or the Ip Address. In our case, because DNS is properly running, we will add the Hostname of our Hyper-V host and click the Next button to continue to the Next option.
Next, select the Microsoft Hyper-V server (standalone) option and click Next to continue.
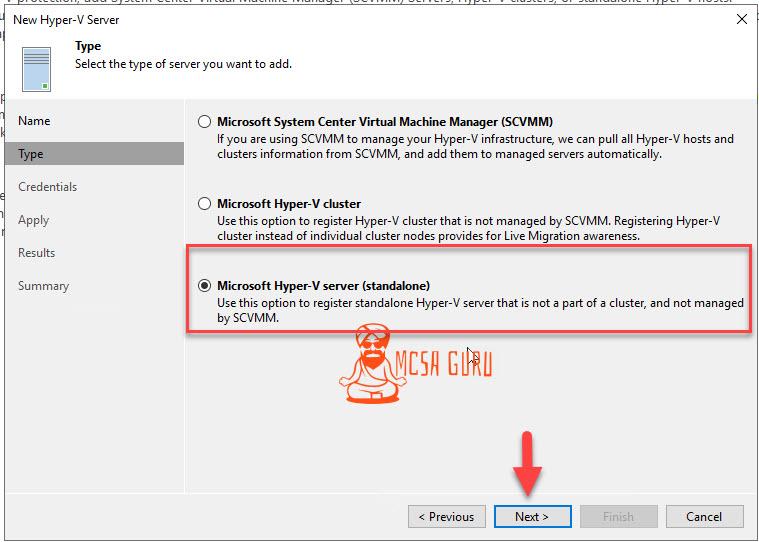
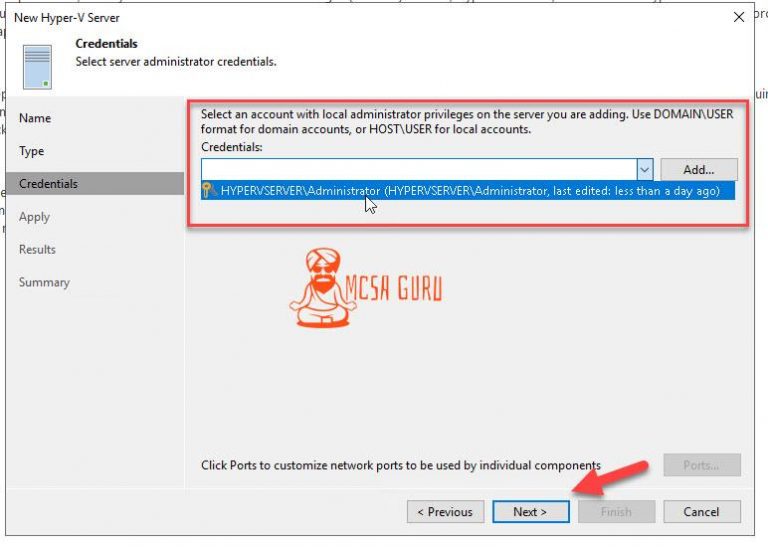
Now, you need to select the Credential, which we add in the Credential Manager previously.
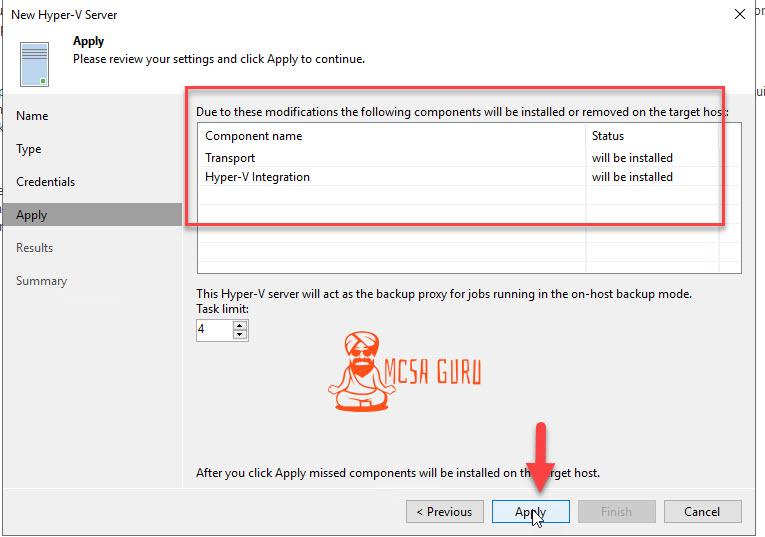
Next, It will show you that some components will be installed on your Hyper-V host. To agree and continue, click on the Apply button.
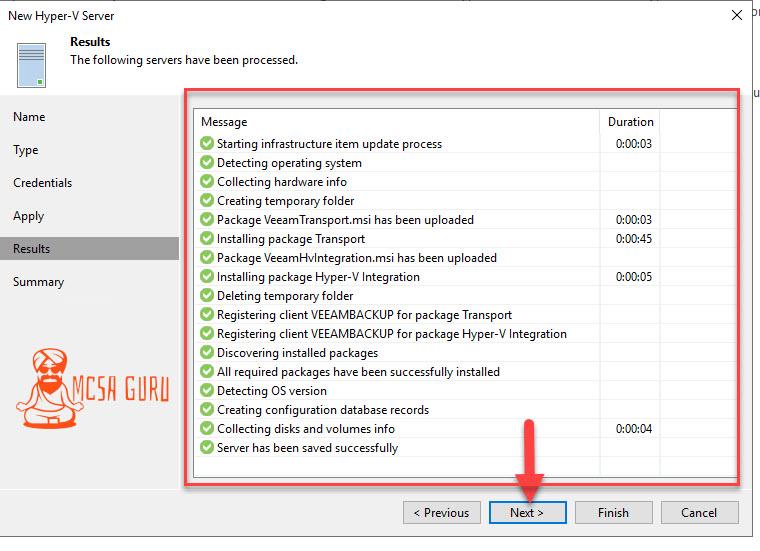
Process for Adding Virtual Infrastructure to Veeam Backup & Replication Console will start, and it will add all the necessary components and services on the Hyper-V host.
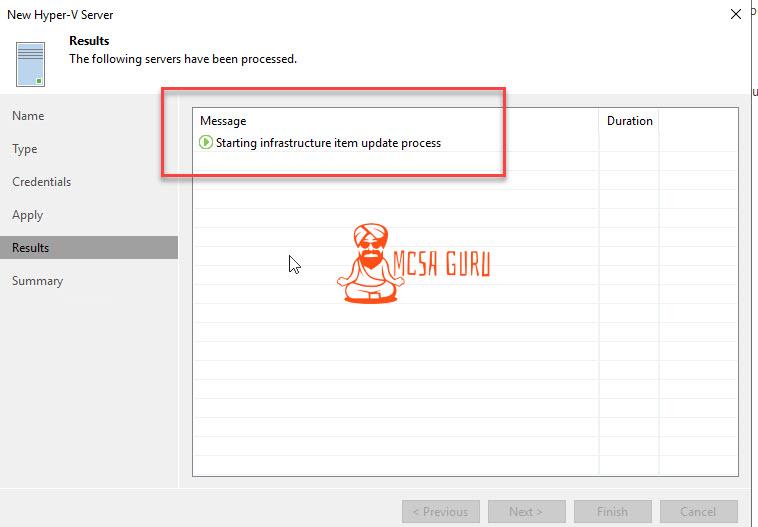
Once the installation of the necessary component and services is complete, click the Next button to continue.
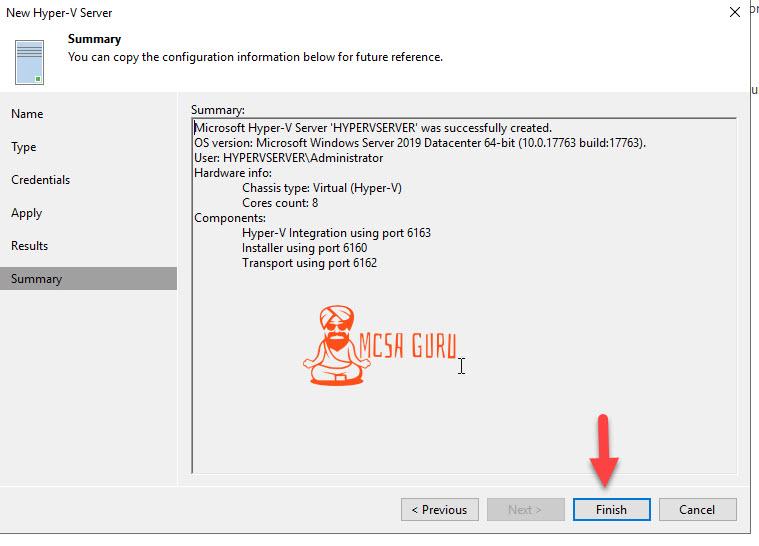
Go through the Summary and click on the Finish button to close.
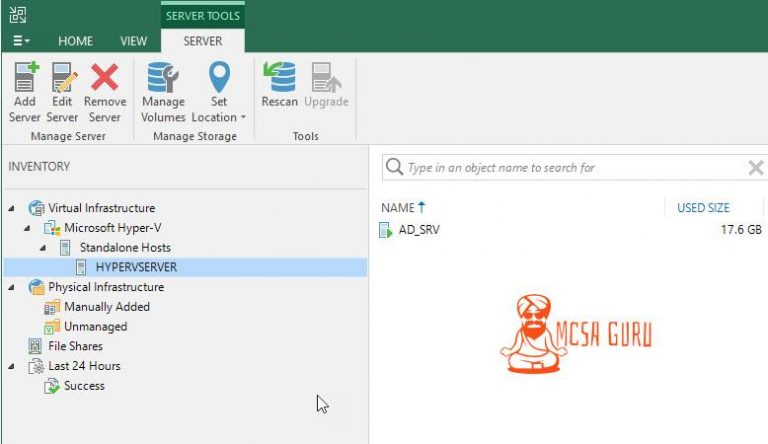
Once you click on the Finish button, you will back to the main console window. Now under the Virtual Infrastructure, you will see the new entry called Microsoft Hyper-V. If you expand the selection, you will see that your Hyper-V server is added to Veeam Backup & Replication console, and it will also show you the Virtual Machines running on the Hyper-V Host as shown in the screenshot below.
